Before you begin
Install OpenTraffic, then install the Cloudflare connector for this walkthrough:
brew install cloudflared
Start your existing web app and check that its local URL opens in your browser. This guide uses http://localhost:5173; substitute the port your app actually uses.
Share the server
- Open OpenTraffic from Applications.
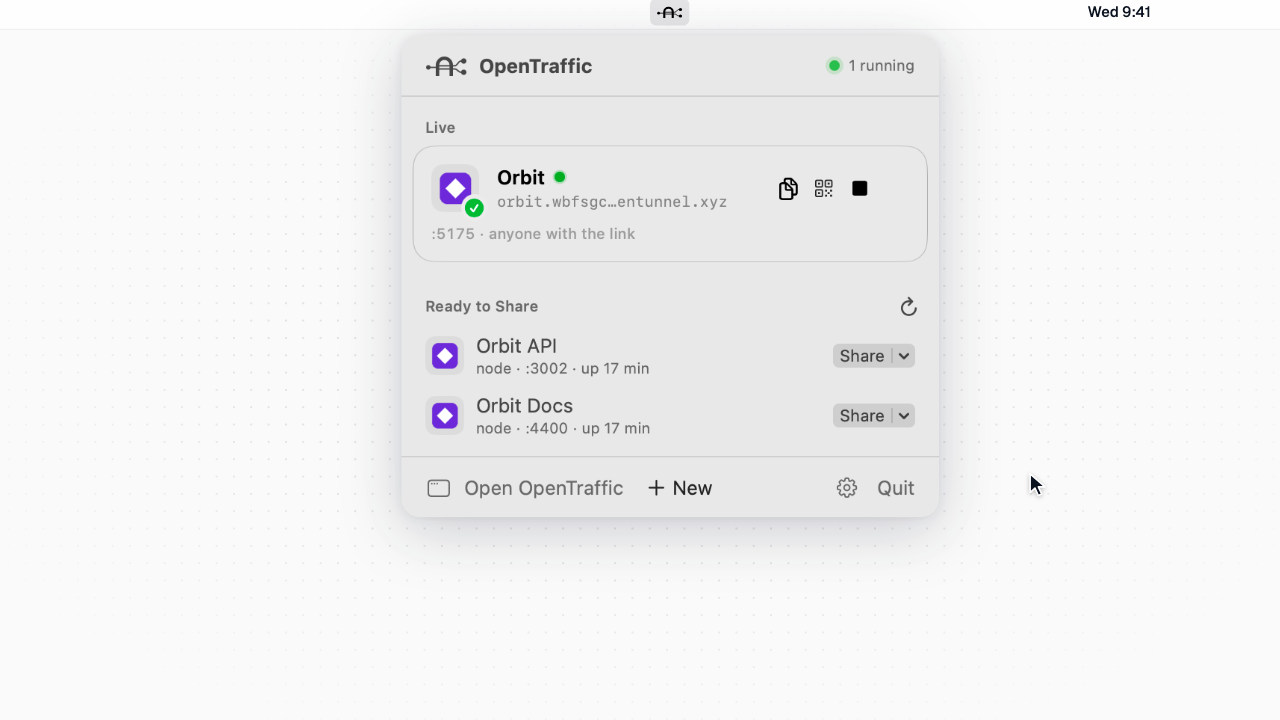
- Click its menu bar icon and find your app under Ready to Share.
- Choose Share ▾ → Temporary URL, or use New Tunnel → Temporary URL and enter your local URL.
- Wait for the public URL and connection checks. New DNS names may need a short grace period.
- Copy the URL and open it in a separate browser window. Send it to your teammate once your app loads.
You do not need a Cloudflare account for a temporary URL. Keep the local server and OpenTraffic running while someone uses the link.
Review it together
Enable Live collaboration on the share. If it is already running, OpenTraffic asks before restarting it; a Quick Tunnel restart normally changes its URL. Open Open as Host for the host controls, and give teammates the public URL.
Use Lead to have visitors follow your page and scroll position. Ask them to use Comment to pin feedback to an element. Their comments appear in the app’s Feedback tab.
Learn about collaboration and its limits.
Stop sharing
Click Stop on the Live card or in the main window. This stops the connector and keeps the saved share. Remove deletes the local saved entry; it does not delete a Cloudflare tunnel from your account.
A temporary URL is public to anyone who has it. Use Tailscale for private tailnet access or a protected share when access control is needed.
If the link does not work
- Local service failed: open the local URL directly and start or repair your app.
- Host rejected: use Fix Host Header or the framework configuration shown by OpenTraffic.
- Starting: allow DNS or certificate setup to finish, then recheck health.
See Troubleshooting for the full checklist.